Hello to any readers here.
I moved houses a few months ago and can't do a backyard garden blog anymore.
However, my church bought a farm and now I'm heavily involved with farming for a CSA.
We just started a blog about our farming experiences at:
www.AnandaValleyFarm.blogspot.com
I'll be posting there about what we are learning and trying out, what has worked well on a small farm scale for us (and even more about what hasn't worked out well).
Stop by.
Saturday, January 31, 2015
Wednesday, July 3, 2013
Rose Hugel Pot Update
The roses in the hugel pots are doing great. Much better than last year before I changed them.
The leaves all stay very green now and the plants don't wilt in between watering.
The best change is that they didn't get the usual rust and black spot disease.
Here's the link to the original posting:
http://lowcostvegetablegarden.blogspot.com/2013/02/rose-hugel-pot.html


These pictures were taken May 7th. The plants are bigger now.
Since I made a lot of changes, can't identify what was most beneficial, but I believe the most significant changes were putting wood chip mulch on top, fertilizing with kitty-urine soaked cornmeal, and automatic daily morning watering with a micro-sprayer, not a dripper.
In another potted plant I did only this and it too improved greatly.
In the hot dry climate here one problem with pots is the soil will dry out at the top and still be wet at the bottom. The wood chips help keep the top moist and evens out the wetness level in the pot.
Also having the top moist encourages small feeder roots critical to the plants growth.
Saturday, April 6, 2013
Kitchen Scraps & Raccoons
Anyone who has tried sheet composting knows that it increases worm population greatly.
This spring I was digging and preparing the garden beds. In one bed that had fava beans growing in it over the winter, I counted about 2 worms per shovelful. In another bed I threw kitchen scraps on it over the winter (California winter, no snow). This bed had about 12 worms per shovelful.
It has always seemed to me that burying or sheet composting scraps is an efficient (i.e. easier) way to use them compared to normal composting. Especially after digging up roots and seeing worm holes lined with vermicompost over a foot and half deep. The only problem is racoons and rats always dig them up.
On a gardenweb board, david52 mentioned he used chicken wire over a bed to deter racoons.
Well inspired by that here's what I've been trying:
Take out a gallon of scraps to the garden bed at a time.

With garden glove on, brush away mulch and scoop a hole about 4-5 inches deep, dump scraps in.

Cover with the dirt and wood chip mulch. The put a 1' chicken wire square on top and secure.
 Each side of the chicken wire square is cut to have sharp points (no smooth surfaces). This deters raccoons from trying to dig in from the side. To secure it, a pepper plant cage was cut up in 3 sections. Each section has one wire ring & 3 legs.
So far, this has worked great. Evidence of racoons prowling around but unable to get the scraps. Have 3 holes so far, no problems. Having 4 of the "wire" setups should allow enough time for the scraps to rot enough in the oldest hole so a raccoon wouldn't want them. Then I can rotate the wire setup to a new hole as more kitchen scraps are available.
 Using this should improve my soil considerably and is easy to implement. Previously I never sheet composted during the summer b/c of rodent problems and normal composting took too much time and required more "browns" (leaves, grass, hay,...) than I had.
Having only a 1'x1' square wire mesh protection, will allow me to place scraps in between plants during the summer.
In the winter time I'd rather not go out to the garden every time we generate 1 gallon of scraps. So the plan is to fill up a 5 gallon bucket which is kept right outside the house. When full go dump it on the garden and rake wood chips over it. To keep racoons away a leftover piece of chain link fence (5'x5') is thrown over the bed. Tried this once and the raccoons could only paw a few small holes through the fence trying to get the food. They left it alone after the first night.

This spring I was digging and preparing the garden beds. In one bed that had fava beans growing in it over the winter, I counted about 2 worms per shovelful. In another bed I threw kitchen scraps on it over the winter (California winter, no snow). This bed had about 12 worms per shovelful.
It has always seemed to me that burying or sheet composting scraps is an efficient (i.e. easier) way to use them compared to normal composting. Especially after digging up roots and seeing worm holes lined with vermicompost over a foot and half deep. The only problem is racoons and rats always dig them up.
On a gardenweb board, david52 mentioned he used chicken wire over a bed to deter racoons.
Well inspired by that here's what I've been trying:
Take out a gallon of scraps to the garden bed at a time.

With garden glove on, brush away mulch and scoop a hole about 4-5 inches deep, dump scraps in.

Cover with the dirt and wood chip mulch. The put a 1' chicken wire square on top and secure.

So far, this has worked great. Evidence of racoons prowling around but unable to get the scraps. Have 3 holes so far, no problems. Having 4 of the "wire" setups should allow enough time for the scraps to rot enough in the oldest hole so a raccoon wouldn't want them. Then I can rotate the wire setup to a new hole as more kitchen scraps are available.

Having only a 1'x1' square wire mesh protection, will allow me to place scraps in between plants during the summer.
In the winter time I'd rather not go out to the garden every time we generate 1 gallon of scraps. So the plan is to fill up a 5 gallon bucket which is kept right outside the house. When full go dump it on the garden and rake wood chips over it. To keep racoons away a leftover piece of chain link fence (5'x5') is thrown over the bed. Tried this once and the raccoons could only paw a few small holes through the fence trying to get the food. They left it alone after the first night.

Saturday, March 23, 2013
Vertical hugelkultur & wood chips vs horizontal hugel
Here's a quick comparison of fava beans growing in a hugelkultur bed. The beans were planted in November, about 4 months ago.
The bed pictured, just beyond the fence, is 12'x3'. The 4' of the bed on the right was my first attempt at hugelkultur. It has mostly horizontally buried logs with no wood chips dug in. The rest of the bed was dug with vertical stumps and wood chips.
No fertilizer was used.
Notice how the fava beans grew much better and thicker in the part of the bed with wood chips and vertical stumps.

Here's a closeup of the favas in the vertical stump & woodchip part of the bed. The stalks are much sturdier and thicker here.

Here's a closeup of the favas in the mostly horizontally buried log portion of the bed.

Saturday, March 2, 2013
Burying Stumps in Sandy Soil
Here's an idea for using hugelkultur in sandy soil.
Ideally for sandy soil you'd want lots of rotten wood dug in for water retention.
However, if you only have dry (not green) unrotted wood available, you could still get benefits from hugelkultur right away.
Bury stumps, branches, split firewood, vertically in the ground about 3-4" below the soil surface.
Then plant right over the buried wood. The plant roots should grow down underneath the wood. The wood will retain a lot of water and slowly "drip" it out the bottom unto the roots, feeding them with a decomposed wood stream and any fertilizer you add (urea, urine, bloodmeal, fishmeal, ...). This is what I observed in "stump containers". See:
http://lowcostvegetablegarden.blogspot.com/2012/09/eggplant-stump-branch-pot-comparison.html
http://lowcostvegetablegarden.blogspot.com/2013/02/rose-hugel-pot.html
Overtime as the wood rots it should hold even more water and since it is large chunks of wood, they won't wash away deeper into the sand with rains.

My own soil is clay, so I've never tested this, but just thought about it after visiting my parents in sandy soil Florida. I would not do this in clay soil. In clay soil, I bury the stumps about 1' under the soil surface. The stumps wick away excess moisture without drying out the soil. Underneath stumps in clay soil, it gets very wet. In the 1-2 inches right underneath a stump in clay soil, I found, that roots will not grow, because it is so wet & mucky.
Sunday, February 24, 2013
Rose Hugel Pot
My 3 container roses have never done very well in the 5+ years we've had them.
Watering has always been too much a responsibility for me, so they were put on an automatic drip system. However the problem is that the mix would get wet right underneath the drip emitters, 5 of them per pot, but just an inch away from the emitter the mix would be dry. And since it was a peat based mix (50% peat, 50% lava rocks or turface), most of the mix would become hydrophobic and stay that way all summer.
The roses would do ok, but clearly stressed.
This year I decided to make them into hugel pots after seeing how well my eggplants did in a stump pot (see post: http://lowcostvegetablegarden.blogspot.com/2012/09/eggplant-stump-branch-pot-comparison.html).
Here are the 3 dormant roses to be repotted.

After taking the roses out and throwing away all the peat based mix, I drilled many small holes in each pot bottom. This isn't for better drainage, it is for better bottom root aeration. This is a critical aspect for a hugel pot.

Next I put in about 3-4" of compost in the bottom of the pots. You want the roots to mat up right at the bottom of the pot over the aeration holes. Here the roots will be kept wet and well-ventilated.

Then I put in wood from a split stump. Must be vertical to be effective. Water will be absorbed into the top of the wood and then slowly released out the bottom. So roots that form at the bottom of the pot will receive a slow water drip that should also have nutrients in it from the wood and any fertilizer you add.


Compost is from a playground wood chips that has decayed over 10 years. No peat to avoid hydrophobic issues. Root-pruned rose goes on top.

Pots are placed in bricks, so air can flow underneath

The yellow clump is a corn meal-based kitty litter urine clump. I'm going to use these as the only fertilizer for a couple of the roses to see how it does. They will be watered in (broken up) after being added. This should deter rabbits also.

Looking forward to seeing how this does.
Hopefully it will cut down on the frequency watering is needed and when I do forget to water and it dries out, it will be easy to water it again without hydrophobic issues.
Late June I'll post an update and at the end of the season I'll take the rose out of the pot for pictures on how the roots are doing.
Saturday, February 16, 2013
Hugel hole preperation
Last year I prepared and planted cucumbers and tomatoes in 3 hugel holes with mediocre results.
Just improved/redid the holes this year using what I learned from last year's experience.
In one hole I had put in horizontally buried branches and also mixed in some leaves. It did poorly. Just adding logs into clay soil isn't enough to make a good growing bed. So I redug this hole out. 2' deep, 2' diameter.

These were the branches I dug out.

Put in vertical stump and branches about 10" to 1' in length. Made sure I left one shovelful depth between the soil surface and the stump. This is so I can easily do a "single dig" in future years, i.e. dig in more organic matter one shovelful deep.

Then I added wood chips and soil to fill in the hole. Alternated 3 shovelfuls of chips, then 3 shovelfuls of dirt. This seems like a lot of wood chips, but after just one summer this clay soil absorbs all but the largest chips.

In this hugel hole last year, I just threw in a stump vertically and mixed in a little bit of leaves. The cucumber plant did very well in this hole. The vertical stump seems to wick away excess moisture will keeping the dirt just the right amount of moistness for the plants. The stump in the ground was from last year.

Added some branches on top of the stump, just enough to keep the wood a shovel depth below the surface.

Then 3 shovelfuls wood chips, 3 shovelfuls dirt, ... After done the pile is 1 foot high. This will be ready to plant in 2 months, mid-April.

I'm really looking forward to seeing what the soil looks like at the end of the summer. This is the first time I've added so many wood chips at once.
Tuesday, October 30, 2012
Wood chip soil pictures
The garden beds, which had wood chips dug into the soil, did the best this year.
So I decided to dig up soil in them and take a look at what was going on.
Most noticeably was that the plant roots all congregated where clumps of wood chips were buried.


Here are two clumps from the same bed. On the left no wood chips had been mixed in. On the right lots of wood chips had been buried. Notice the almost total lack of roots on the left, yet these clump were only about 4" away from each other in the ground.


Here I dug up soil from a regular hugel bed (horizontally placed logs). In the spring I did dig in some pine needles & leaves, but they had totally disappeared. The cucumber growing in this bed did ok, but not great. Cucumbers growing in the wood chip bed did great. Cucumbers growing in just a clay bed (no wood chips, no hugel logs) did very poorly (didn't produce any harvest).

There were lots of worms and worm holes in the this soil, but it was still thick clay and no where close to being as good as the soil in the wood chip bed.

So I decided to dig up soil in them and take a look at what was going on.
Most noticeably was that the plant roots all congregated where clumps of wood chips were buried.

Also very noticeable, there was lots of worms throughout all the soil, soil that had wood chips and soil that didn't. In previous years I had never seen so many worms. I believe having the wood chip mulch encouraged more worms than the leaf and pine needle mulch that I used in previous years. I had wondered if worms would feed on wood chips, it seems that they do.

Here are two clumps from the same bed. On the left no wood chips had been mixed in. On the right lots of wood chips had been buried. Notice the almost total lack of roots on the left, yet these clump were only about 4" away from each other in the ground.

Another soil & wood chip aggregate from another wood chip bed. Notice the darker parts of the soil in this picture. These are worm castings. The soil had lots of worm casting deposits wherever wood chip clumps were, even over a foot deep.

Here I dug up soil from a regular hugel bed (horizontally placed logs). In the spring I did dig in some pine needles & leaves, but they had totally disappeared. The cucumber growing in this bed did ok, but not great. Cucumbers growing in the wood chip bed did great. Cucumbers growing in just a clay bed (no wood chips, no hugel logs) did very poorly (didn't produce any harvest).
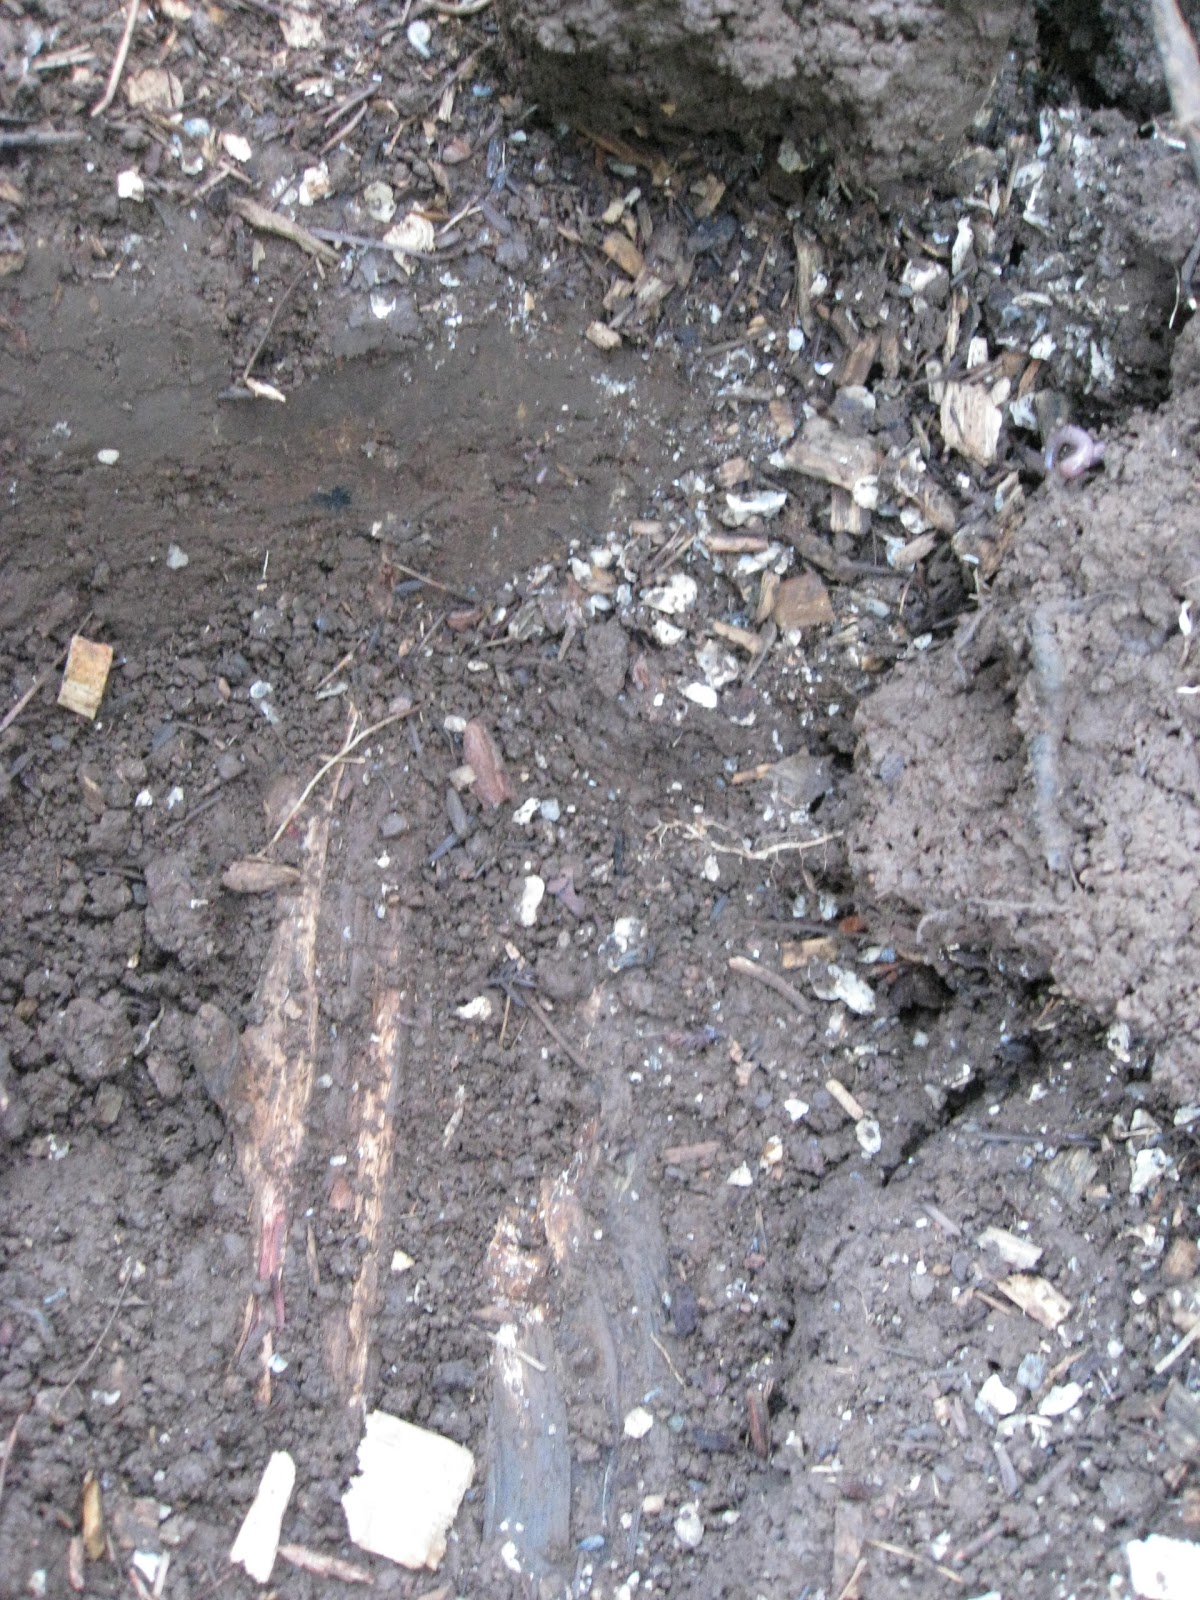
There were lots of worms and worm holes in the this soil, but it was still thick clay and no where close to being as good as the soil in the wood chip bed.

It seemed the roots did best in soil that was about one-half wood chips!
Quite a surprise.
As another experiment, I had planted a couple seedlings above some wood-chip-only clumps in the soil that were about 3" deep and 5" diameter. The plant roots did not like growing into only wood chips and these plants didn't do as well.
Seeing how well roots did in "wood chip soil", has given me confidence to really go all out when digging in chips. I had wondered what would be too much. But it seems even 1/2 chips, 1/2 dirt is great for the plants. If I had seen this before I prepared my 4 new hugel beds, I would have dug in even more wood chips. For the 2 existing wood chip beds, I'm digging in a lot more chips now, before planting fava beans.
Monday, October 22, 2012
Garden bed construction
This last summer I experimented a lot with different growing methods in my garden and in containers.
Based on the results, this fall I redid my garden beds using:
1. Vertical hugelkultur
2. Large quantities of wood chips dug in the soil.
In small test beds this year these 2 techniques did the best.
Just completed 4 beds, here are pictures of building one.
Dug down average of 2.5 feet. At that depth I hit a layer of pottery-like clay that would be unusable for garden soil.
This bed is 3.5 feet wide and 12' long.

Added wood scraps, from splitting wood, at the bottom.

First layer of vertical stumps, packed closely together.

Added dirt mixed in with wood chips and then put a 2nd layer of vertical stumps.

More dirt and lots of wood chips.

Added a 3rd layer of branches, partially rotted and began building retaining walls from logs and 1/2" rebar.

No pictures, but did add a 4th layer of larger branches placed horizontally on top of here.


Also made 2 other beds without retaining walls. Those ones only had 2 layers of logs, one vertical, one horizontal. So they did not raise the soil level as much.

The only cost for these beds was the rebar (~$30). All the logs, stumps, and chips were free. Lot of digging though. Didn't get a chance to go to the gym for the last 6 weeks :)
Roughly the top 6" or more of soil in each bed does not contain logs or branches, just dirt and wood chips. This is to make it easy in future years to dig in more wood chips with a normal shovel if this will be needed. The soil is very thick clay and I believe I'll need to dig in more chips in a couple years.
Based on the results, this fall I redid my garden beds using:
1. Vertical hugelkultur
2. Large quantities of wood chips dug in the soil.
In small test beds this year these 2 techniques did the best.
Just completed 4 beds, here are pictures of building one.
Dug down average of 2.5 feet. At that depth I hit a layer of pottery-like clay that would be unusable for garden soil.
This bed is 3.5 feet wide and 12' long.

Added wood scraps, from splitting wood, at the bottom.

First layer of vertical stumps, packed closely together.

Added dirt mixed in with wood chips and then put a 2nd layer of vertical stumps.

More dirt and lots of wood chips.

Added a 3rd layer of branches, partially rotted and began building retaining walls from logs and 1/2" rebar.

No pictures, but did add a 4th layer of larger branches placed horizontally on top of here.

Here are 2 completed beds, built with retaining walls.

Also made 2 other beds without retaining walls. Those ones only had 2 layers of logs, one vertical, one horizontal. So they did not raise the soil level as much.

The only cost for these beds was the rebar (~$30). All the logs, stumps, and chips were free. Lot of digging though. Didn't get a chance to go to the gym for the last 6 weeks :)
Roughly the top 6" or more of soil in each bed does not contain logs or branches, just dirt and wood chips. This is to make it easy in future years to dig in more wood chips with a normal shovel if this will be needed. The soil is very thick clay and I believe I'll need to dig in more chips in a couple years.
Subscribe to:
Posts (Atom)